

Hanging out in the kitchen with the mixer and spatula is especially common when certain seasons roll around, or birthdays, or gatherings, or celebrations, okaaay, I just give myself excuses to get to the flour. Hey that’s not a bad thing right? (: The baked goods usually get whopped up by family, friends and more friends, and then its totally gone. I wanted something that I could consume the batch in its entirety and not feel guilty for munching on half a block of butter. Or 1 stick if you will. The mental image of that is just not very pretty, Oh wait, throw in about ½ cup of sugar and some flour and more mix-ins like chocolate chips and nuts.
And I don’t want to look at the bright and all-inviting starbucks pastry display and go aww! I really want the bagel but wait, aren’t bagels unhealthy? +cream cheese (which is totally divine with bagels by the way). Plus with the fortune I already surrender to the starbucks coffee company but is money well worth it and well spent, I don’t think I will be having any of those all-inviting looking bagels, or cheesecakes for that matter):
Then I visit my favourite baking sites and find out what actually goes into bagels. Hey-o its not that bad actually! Homemade ones that is. But it’s weird though comparing bagel recipes from different sites. (This is the problem when you browse or have feeds to too many yummy food sites) I found some recipes that were so simple! And some others that took 2-3 pages, with even more complicated steps! How? But with regards to the healthy or not thing, I think they’re pretty ok considering that I didn’t use any butter for the entire recipe.
I wanted authentic yummy bagels but will those short recipes do? Or the longer the recipe the better? Finally settled on one with many process pictures and positive affirmation from the baker on her site that the recipe indeed yields chewy yummy bagels. Plus, the recipe was simple enough and looked pretty straight-forward. I can’t do with complicated bread recipes because this for one is the first time I’m making bread from scratch.
This is in retrospect of the entire bagel making process, and I was right about the ‘can’t-do-complicated’ thing because little did I know, the very enthusiastic, and impatient me, messed up the very first step. Waay to go.
The recipe is below but step #1 says to dissolve yeast and sugar in a small bowl with warm water. That’s right, I used hot water straight out of the kettle, and killed the yeast instantly. Steps thereafter were technically void because everyone knows to make bread you need yeast to make it rise.

This seemingly perfect stiff and firm dough would make any first time bread maker happy. But it was filled with dead yeast (ha that just sounds gross)
Usually I would just be rather upset with the un-rising dough and eventually dump it and not continue with my bagel quest, but since the recipe is too easy, I decided to try again and rise it did! I was checking on the ‘progress’ every 15min because the recipe instructs to leave in a moist and warm environment till the dough doubles in size. This is so reminiscent of secondary/JC biology where we learn about enzymes! And their need for warmth and moisture to have ideal reactions, but we shan’t go into that here aight(:
But I didn’t really have a warm (ie: 37-40deg Celsius) environment like that of the microwave. Preheating and maintaining the oven temperature would be too much trouble difficult to handle so I just popped the dough in the blazing noon sun and hope the heat does the trick and that 5degc is not going to make the difference(: This is one time I am thankful for the heat and humidity Singapore has to offer. Cover with damp cloth and watch the rising dough! Wheee
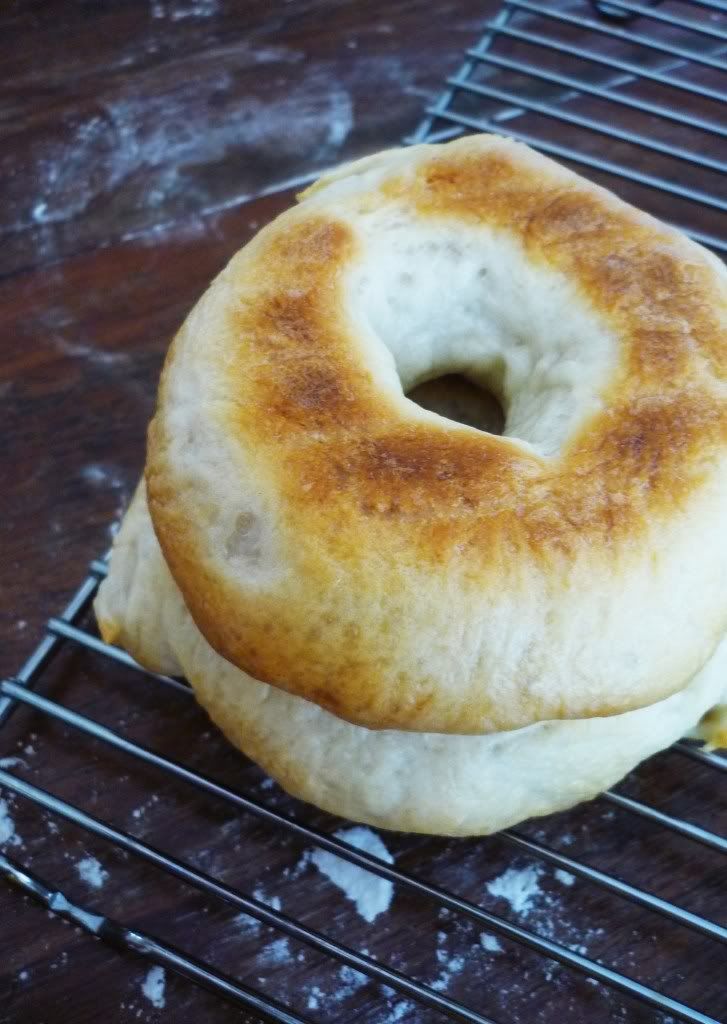
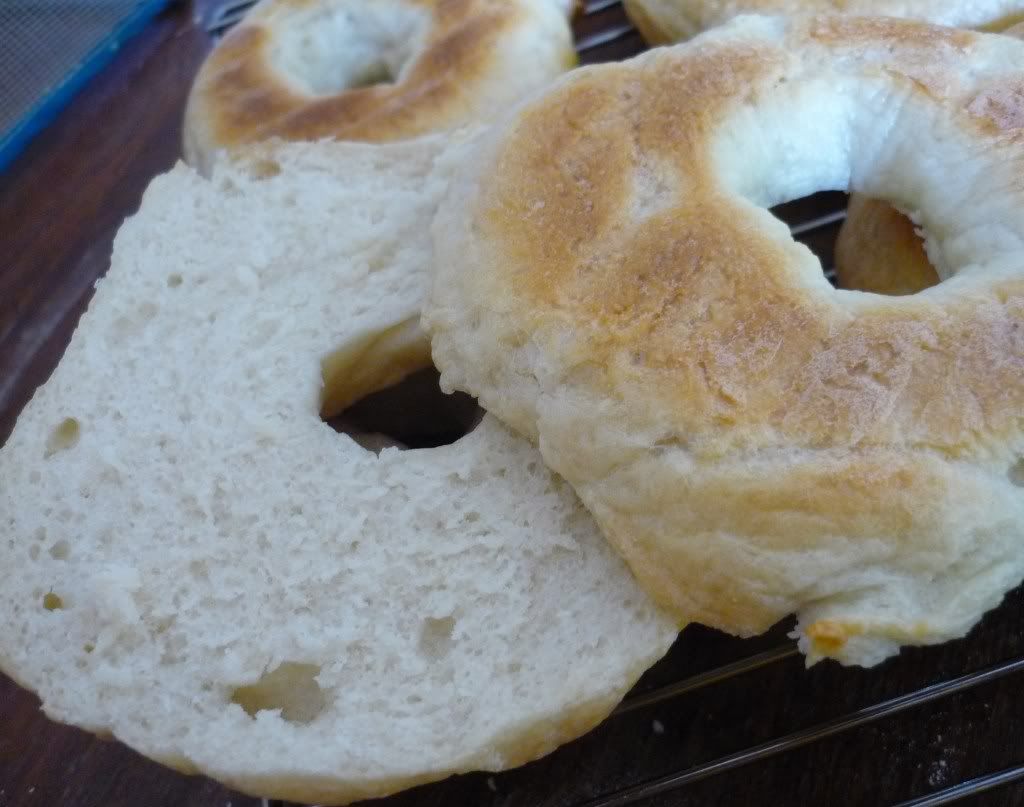
Followed the recipe pretty much to the T because like I said, I don’t have the experience like I do with cookies. And I have to say, great recipe! I really got 8 normal bagel sized (if its too big it wouldn’t be an authentic bagel right? Although it still tastes the same) mounds of golden bread that do indeed taste of the bagels I had in the USA.

I am so happy! Bagel success!(: And if you’ve never baked bread at home, please do ! It gives you the I-never-want-to-eat-another-commercially-made-bread feeling which is pretty awesome, or maybe it’s just the satisfaction of the whole process. But then again, quite few smells can beat the smell of freshly baked bread (bagels in this case) and I have bagels for the entire week so, yay:D
And I can eat the entire batch without feeling guilty! Double yay:D
But of course, if you slather it with cream cheese, it’s a different story(; Use a little cream cheese and some homemade lox (cured salmon) and it’s good to go!
I had doubts myself about making cured salmon because it IS technically – raw! And still raw! And the only raw salmon I trust to eat is sashimi (and that’s pretty much the highest grade salmon) But this recipe says raw salmon (+dill+salt+sugar+ground pepper) left overnight under weights can produce cured salmon similar tasting to smoked salmon.
I decided to go with it for the love of salmon and oh well what’s to lose? The most I would be throwing away icky failed fish the next day right?
Now I’m pretty glad I stuck to it because I got successful homemade lox (and a ton of it! from 1 salmon fillet for $5), cream cheese and fresh out of the oven bagels.
Citing reasons that bakers do need to try out their finished products, and I can’t possibly take a bite out of a bagel and put it back, I decided to have a bagel for dinner! All-day breakfasts work for me pretty well. Took the ugliest bagel (it’s instinctive, really to eat the ugliest one, because I always bake with the intention of giving away and anyone would like to give the pretty ones away so by default I always end up with the ugly ones), spread bit of cream cheese, on goes the lox, and ohmygosh, YUM!
(check out the ugly bagel above haha:D)
Ok can’t talk now, bagel time.

Basic Bagels
From Ultimate Bread
Makes 8 bagels
2 tsp dry yeast
1 1/2 tbsp sugar
1 1/4 cups (300 ml) warm water
3 1/2 cups (500 g) unbleached flour, plus extra for kneading
1 1/2 tsp salt
Sprinkle the yeast and sugar into 1/2 cup of the water in a small bowl. Leave for 5 minutes and then stir to dissolve. In a large bowl, mix the flour and salt together. Form a well in the center and pour in the dissolved yeast.
Pour half of the remaining water into the well. Mix in the flour and stir in the reserved water as needed, forming a firm and moist dough. Turn out onto a floured surface and knead until smooth and elastic, about 10 minutes. Gradually work in as much additional flour as possible while comfortably kneading to form a stiff and firm dough.
Put the dough in a lightly oiled bowl, turning the dough to coat it. Cover with a towel and let rise for 1 hour or until doubled in size. Punch down and let the dough rest 10 minutes.
Divide the dough into 8 pieces. Shape each piece into a ball – cup between your hands and press the bottoms together between your palms. Press down to get rid of air bubbles and roll the dough between your palm and the work surface to form a smooth ball. Coat a finger in flour and press it through each ball to form a ring.
Work the rest of your fingers into the hole, stretching the ring and widening the hole to about 1/3 of the bagel’s diameter. Place the bagels on a lightly oiled baking sheet and cover with a damp towel. Let rest for 10 minutes and preheat the oven to 425 degrees F. (220degC)
Bring a large pan of water to a boil and then reduce to a simmer. Use a perforated skimmer to lower the bagels into the water in batches of 2-3. Boil, uncovered, until they rise to the surface, about 1 minute. Turn them over once. Then remove from the pan, letting the water drain, and transfer to a lightly oiled baking sheet. Bake 20 minutes, until golden, and cool on a wire rack.
Homemade Lox
Recipe adapted from 17andbaking
250g salmon fillet (make sure to remove bones)
1/4 cup light brown sugar
1/4 cup white sugar
1/2 cup salt (use kosher if available)
1/2 tbsp dried dill
1 tsp finely ground black pepper
Place a large sheet of plastic wrap on a tray. Sprinkle half the cure over the wrap and place the fish in it. Sprinkle the top of the fish with the remaining cure, and wrap tightly. Compress heavily.(eg: I used a heavy tray filled with fruit which I took from the fridge) Refrigerate. Cures in about 24 hours, depending on the thickness of the fish. (1/2 inch thickness takes about 24 hours)
Drain the drip tray and rinse the fish. Pat dry with a paper towel and slice thinly on a bias. Keep refrigerated.

Comments (0)
Post a Comment